Well,
once I made a guitar amplifier named DiamondG. It was at least ten years ago.
I drawed on it a celtic shaped knot, symbol of Arianrodh celtic goddes. I used that amplifier for some time, then I dismantled it and I decided to cut the drawing, and use it somehow in a later time. This is what matured after all these years.
The Tiny Santa’s Helpers

Merlino was happy about the project, and he came to my tabe helping me with counts. Sibilla, oh, well.. she were not sooooo happy. She just looked at me and Merlino as we were two jerks.
The idea


That was the amp, and the drawing where everything had began, more than 10 years ago.
The idea stayed there in a drawer for long time, after I dismantled my amp. But I sometime need lot of time to let my ideas to mature.
So I thought to make it a little bigger and bigger, and make a designed “poor art” bookcase for my lounge wall.
But now these days, I was mesmerized when I found my bookshelf already built around the world. I discovered it after I drawed all my sketches. Yes, I understand that this is a common celtic shape, but I would’t ever think to find similar bookshelves around the globe. So it was something like inventing something that already exist. But I don’t mind. I’m very happy to be one of the few lucky ones.
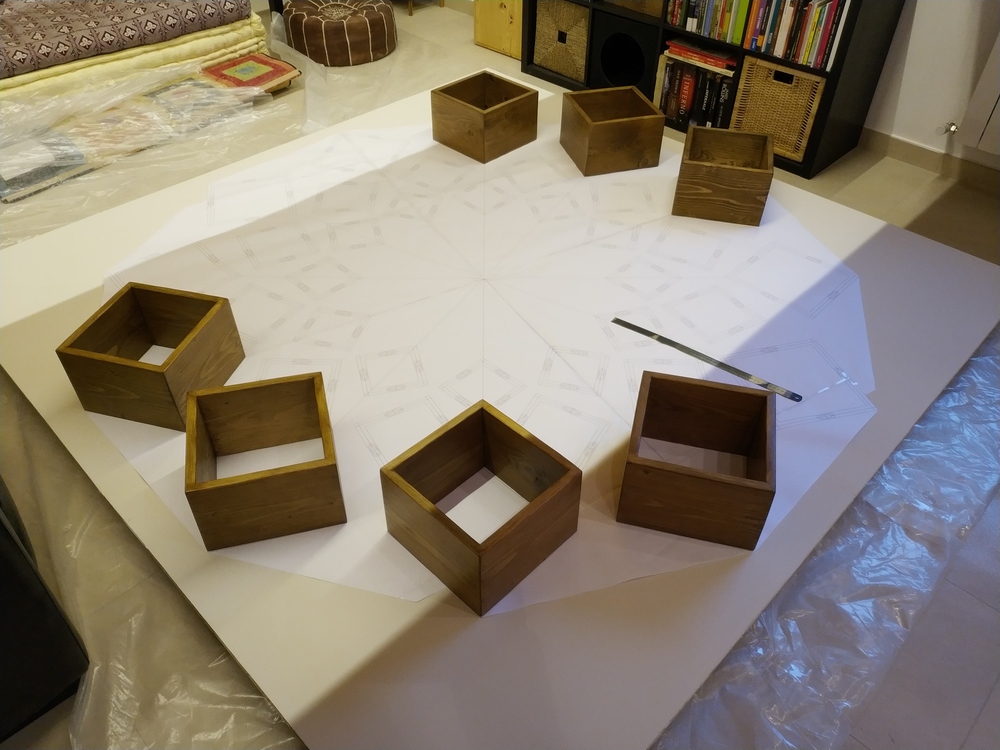
Bill of materials

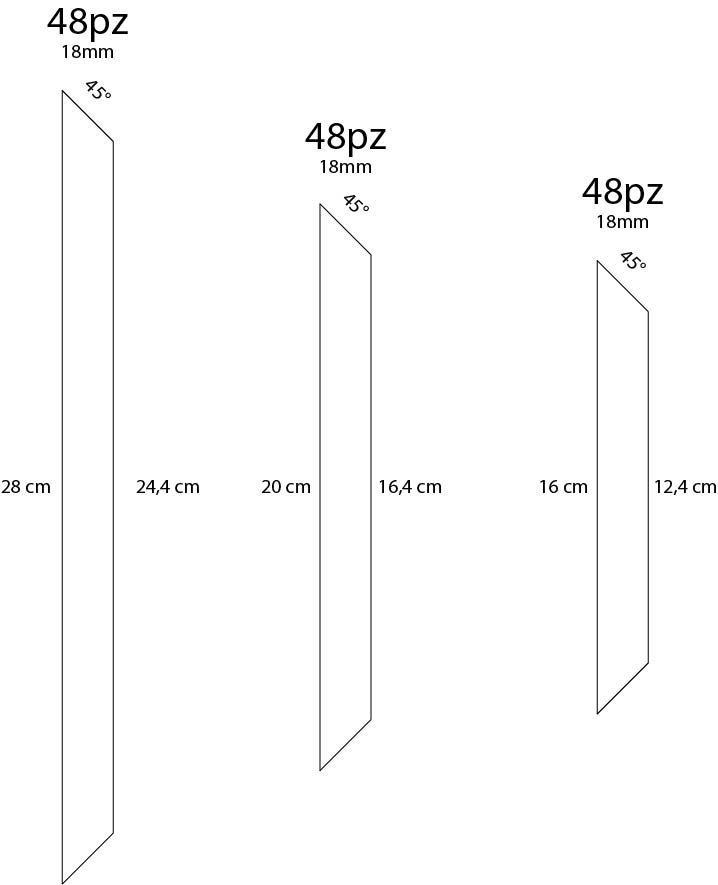
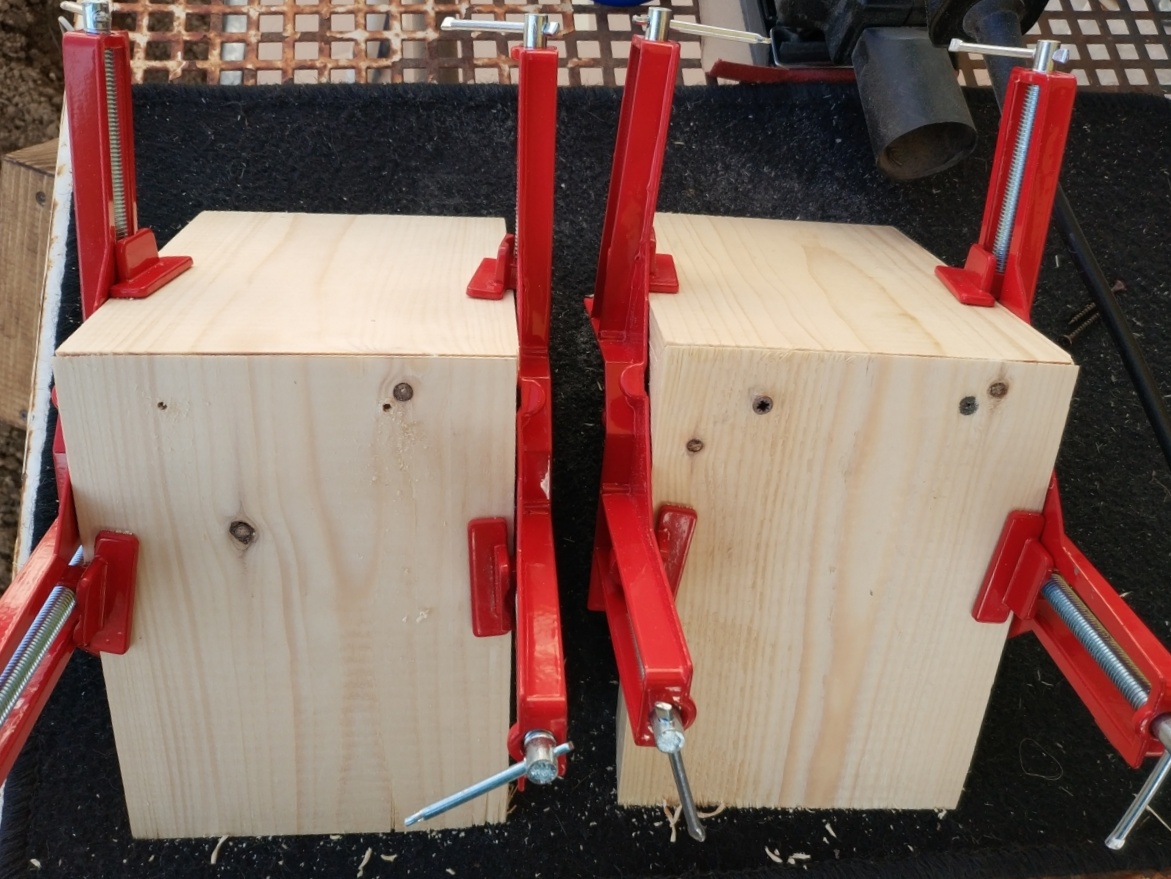
45° pieces
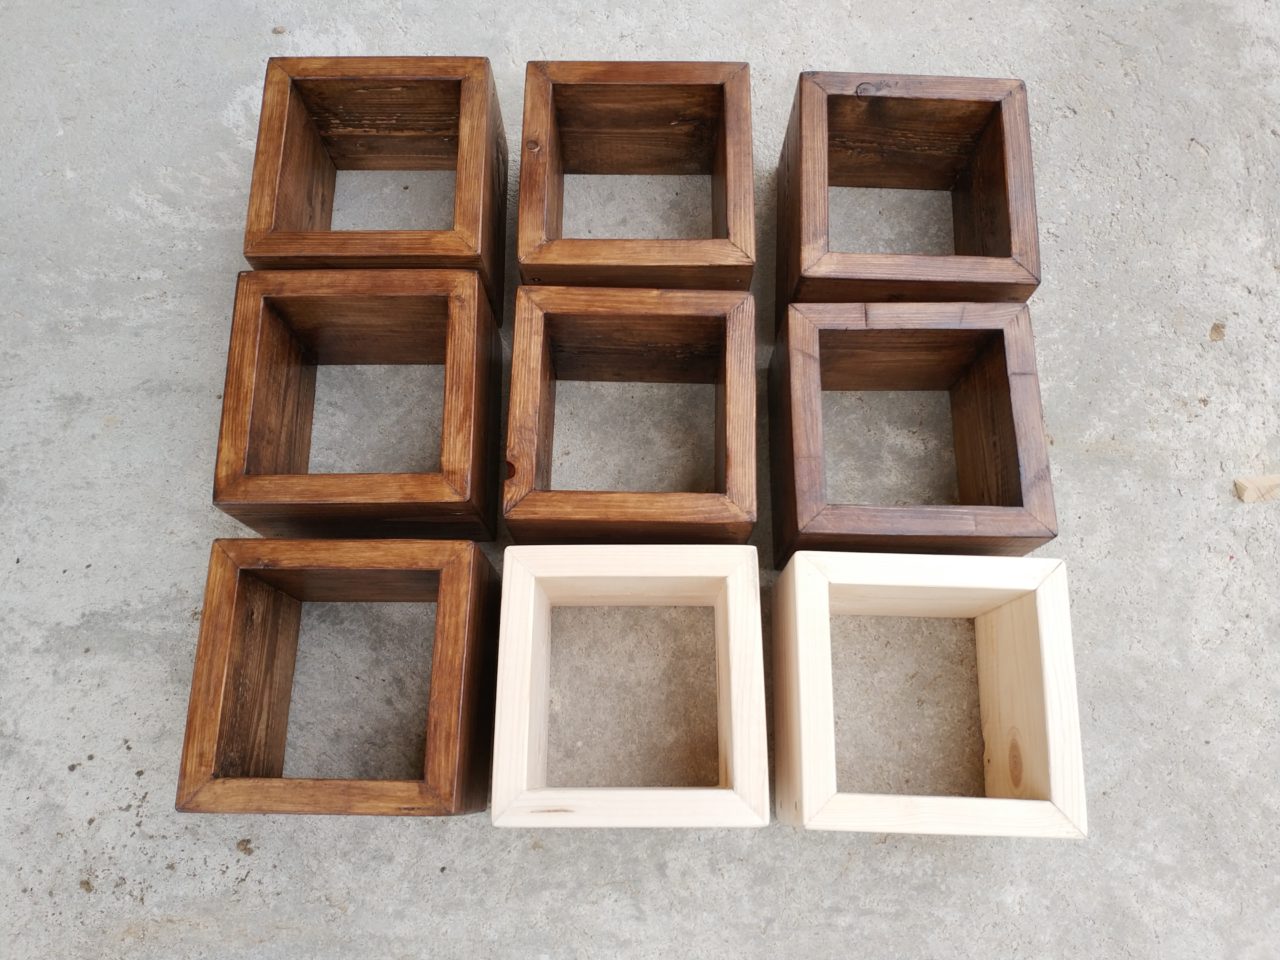
The cubes are sized with 18mm fir tables
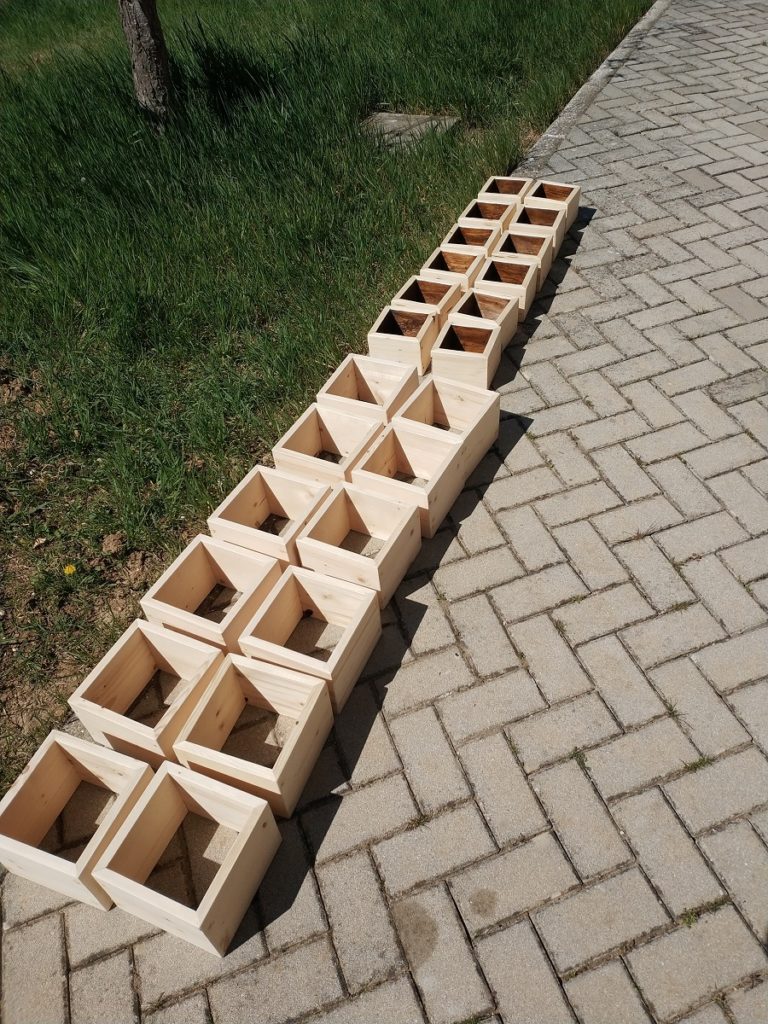
- 12pcs of 16cm x 16cm – depth 11cm
- 12pcs of 20cm x 20cm – depth 14cm
- 12pcs of 28cm x 28cm – depth 18cm
I bought an economy Einhell electric saw which is not so accurate, but it is enough for some small jobs during a year (it’s a cheap 140$ electric saw so I cannot pretend too much from it).
I counted more than 600 cuts, and I’m pretty happy that I still have all my fingers. So, be always extremely careful when using an electric saw. Wear earplugs and glasses. also, make some kind of rithmic repetitive movements, and never turn your eyes off from the saw. Your fingers are your friends. Don’t lose a finger please. A bookshelf does’t deserve a finger!


About the frame and dry wall


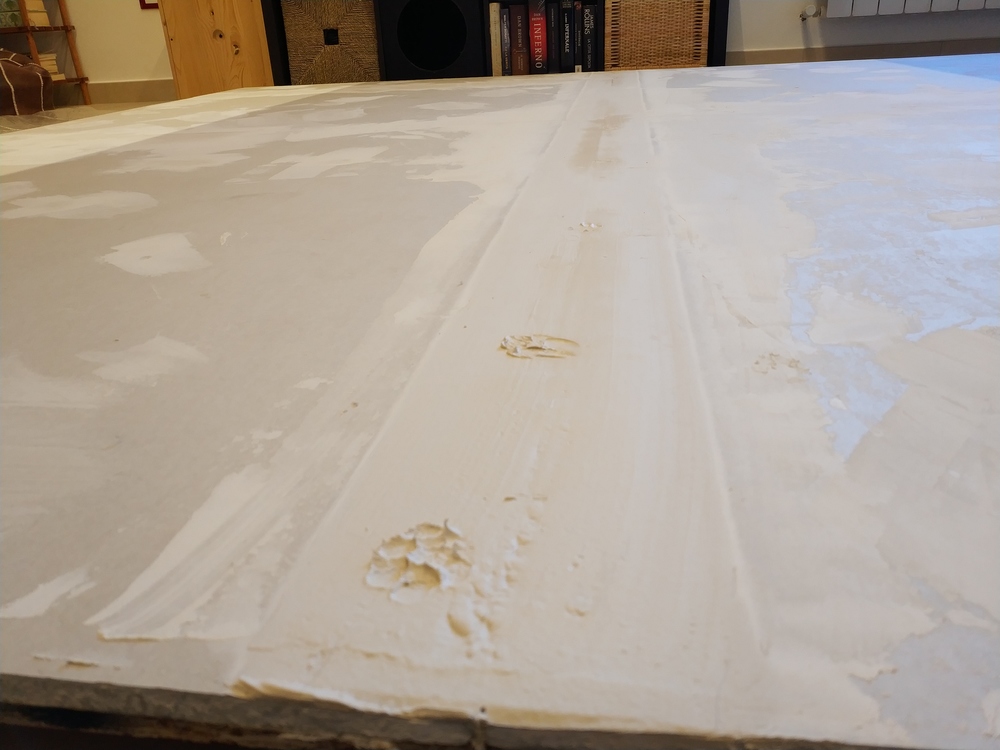
the idea was simple. I made a kind of frame where attaching a sort of biscuit of wood panel and plasterboard panels. Here you could optimize some weight. I choosed these materials, as in the end it was simplier to paint the panels, but you could use a 12-13mm mdf panels to put down some weight (at least 30-35 kg of the plasterboard panels), without loose any stability of the structure.
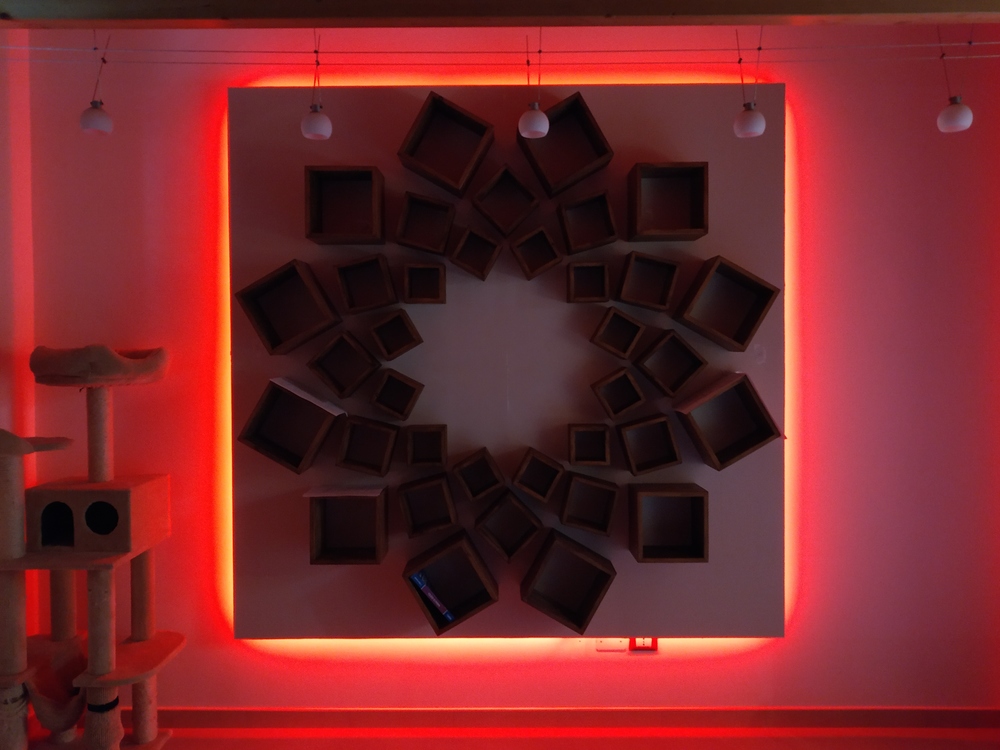
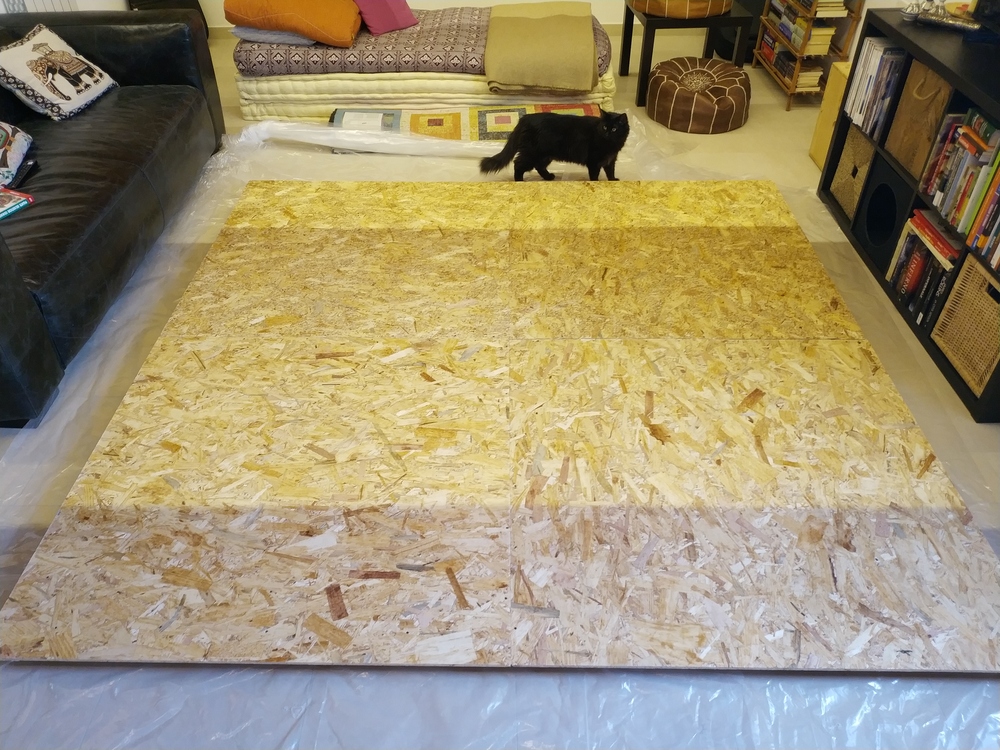
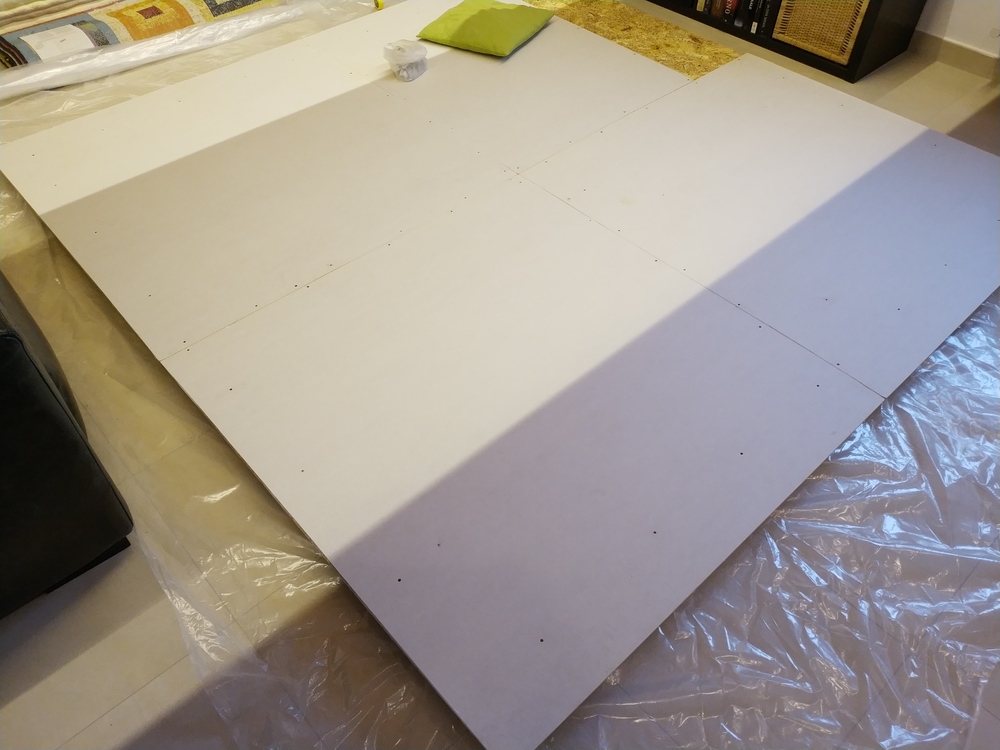
However.. The frame is 218cm x 218cm (all the project file are in the previsious step). I screwed a 230cm x 230cm panel on it, to have a final nice looking (doesn’t seems like to a giant painting on the wall?)


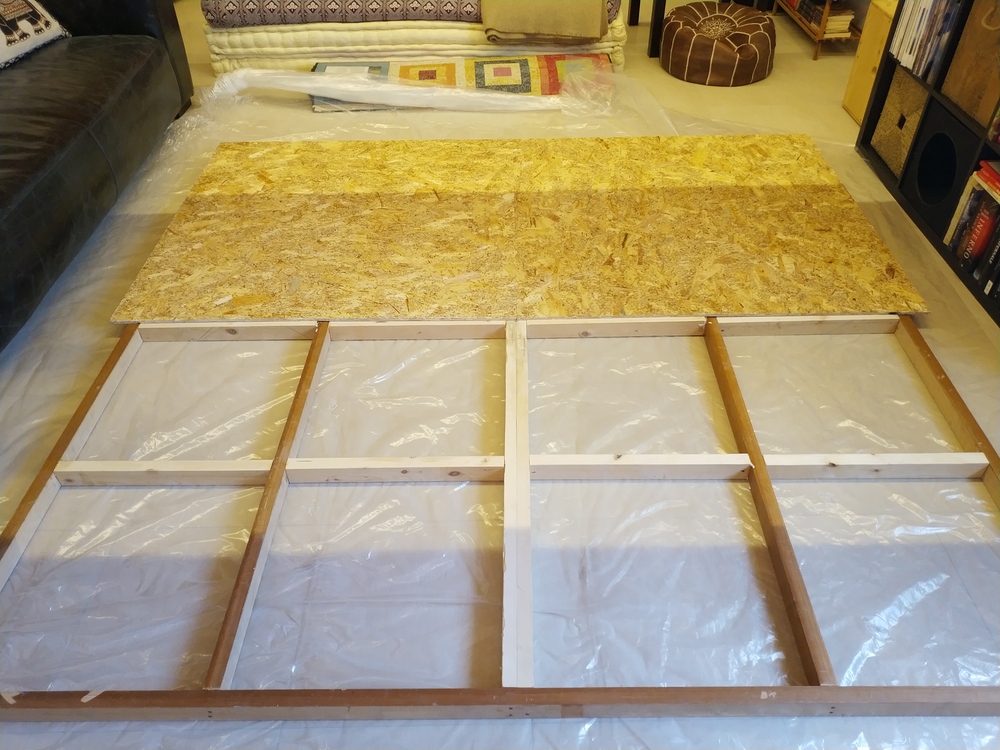


I built the wall in the lounge. It is an easy build, but remember tu use long screws and glue all the joints with vinavil glue. It must sustain a huge weight!!!!! Here’s what you’ll need:
- 2pcs 218x3x5 cm
- 4pcs 212x3x5 cm
- 1pcs 212x6x5 cm
- 12pcs 50x3x5 cm
- 4pcs dry wall panels 115cm x 115cm
- 4pcs wood panels 115cm x 115cm
- An half kilo of scews
- some spare screwers (you’ll need for sure)
Grouting and Sealing of the Joints (Part 1) and Painting – How to Steal a Property (part 2)


Clean the panels and start grouting the joints. Be sure that when you’ll finish everything, your cat will sign and steal your job with his paw and you’ll have to discuss with him for the rights. 😀
So never lower your guard or your cat will win 😀
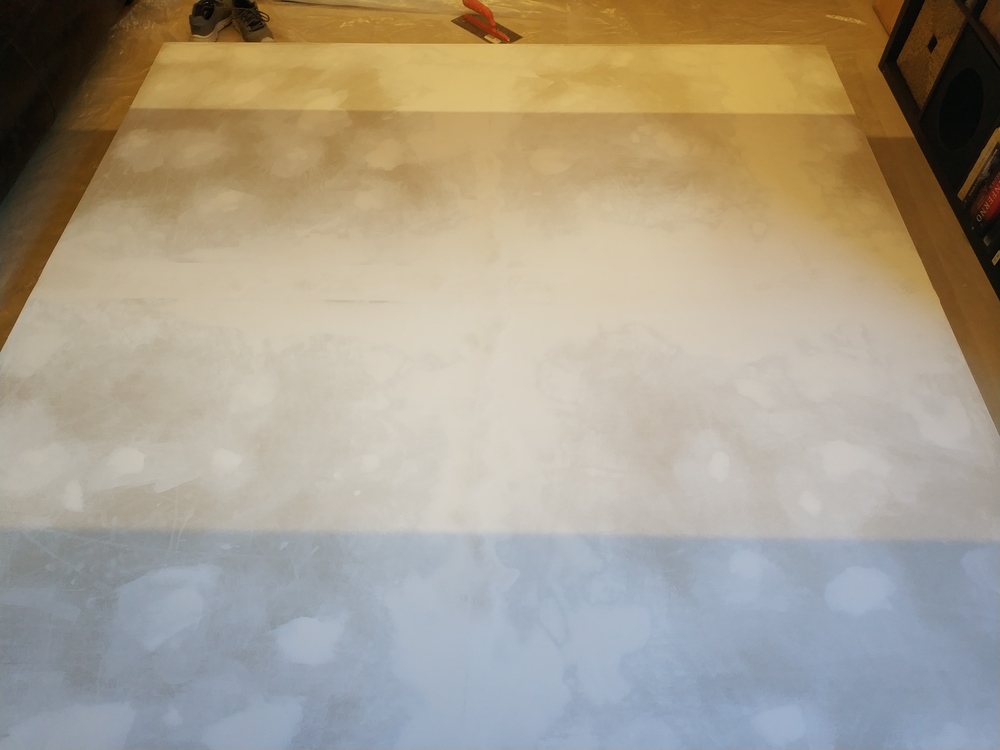
After the discussion we had to decide the color of the paint for the wall, so we opted for a very light cream color (maybe a bit more dark color could have had a better result and more noticeable). At the end I gave 3 hands of rollers for a perfect uniform result.


We are almost at the end of the game.
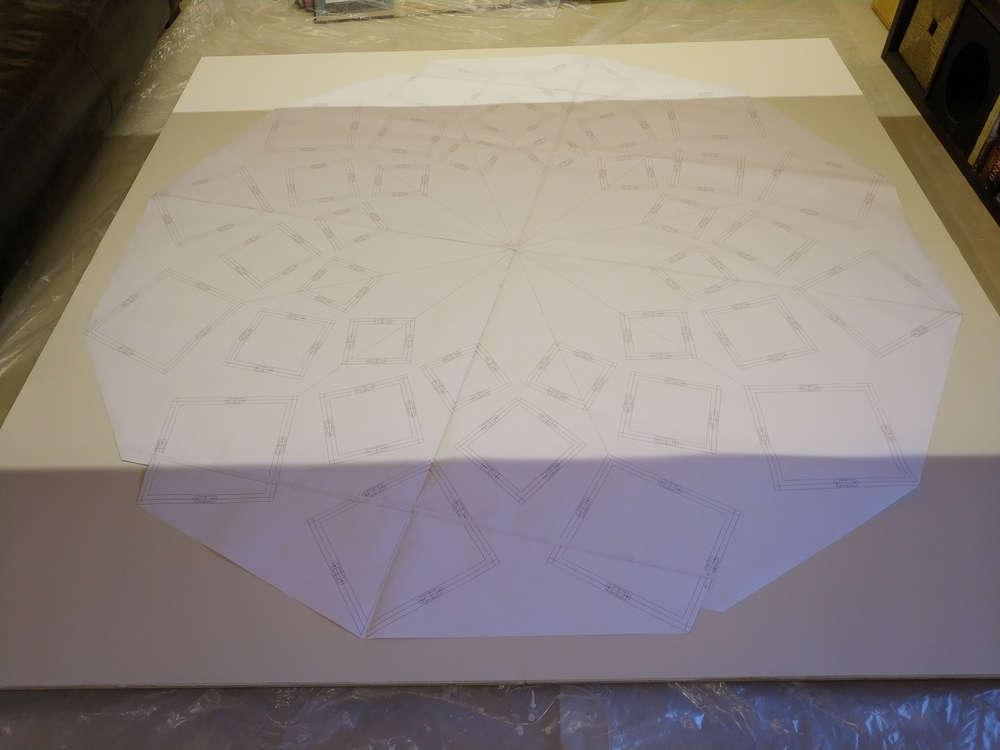
Just use the plotted project and stick in the middle of the wall with some tape. Use it as a model where to position all the cubes. Use a drill to make all holes in the panel. Use the drawing stiched on the panels for reference.
Then you will need help and you need to put on feet the wall. You need someone screwing the cubes while you keep them in place on the other side of the panels.
Attach the bookshelf to the wall


Ok, this is the key of everything.
You have a more than 130kg structure (and you’ll put on some books later too).
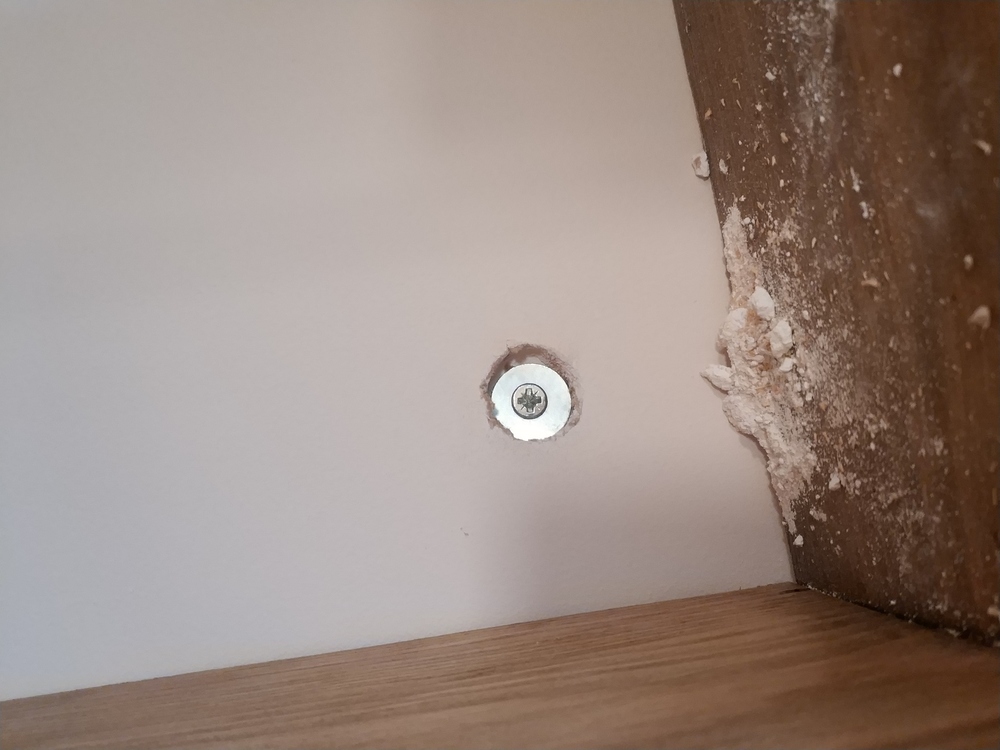
It is EXTREMELY important that you anchor the bookshelf on the wall with proper fishers and screws.
Use proper fishers and thick and long screws to anchor on the wall everything (each wall needs different materials). They need to sustain a huge weight. I anchored 4 wooden bars on the wall with a couple of fisher each one, and use long screws (I used 18cm long ones).
I used also other 4 anchor points on the upper side of the bookshelf to be comfortably secured.
Also, Once put the whole thing in place, I placed some screws on the top of the frame, anchoring to the bars on the wall, behind the panels, to make impossible for the bookshelf to move from his place.
At the bottom, I used also some iron “L” shaped stands where I latched the bookshelf.
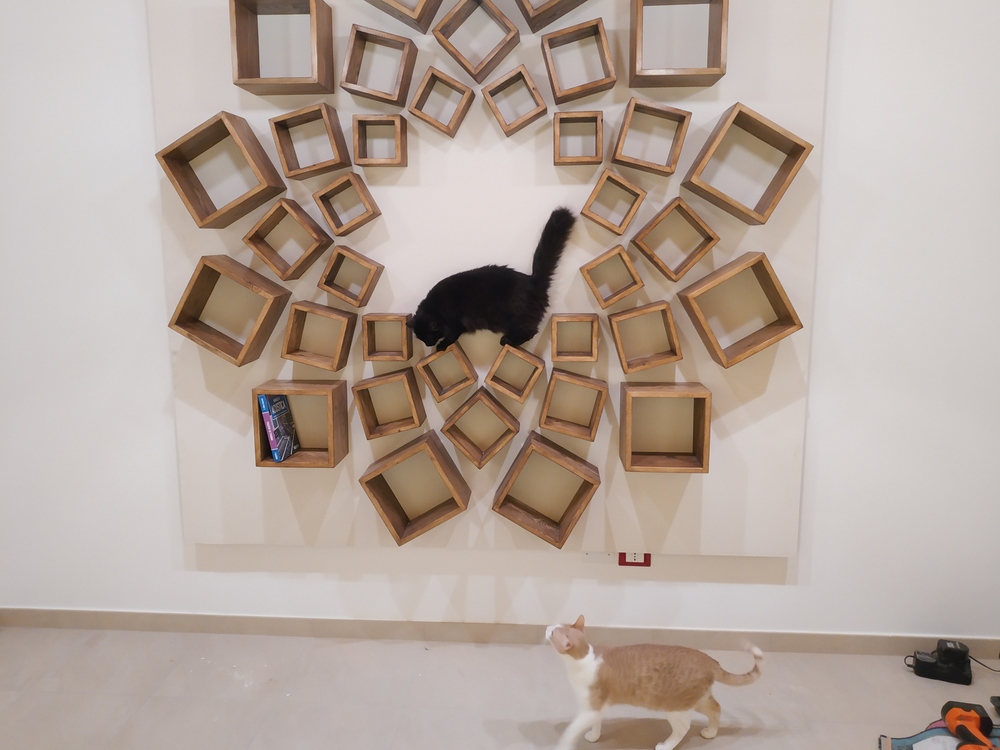
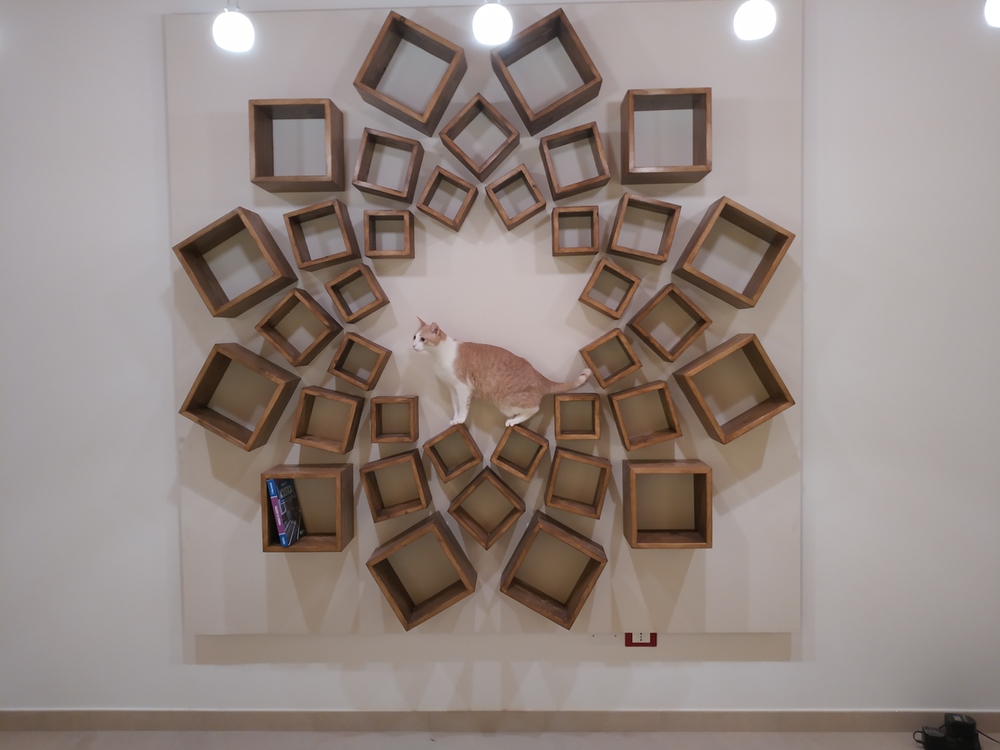
Quality Check Inspection
Sibilla, who were not so happy at the begin, tried herself the strength of the structure and finally approved.
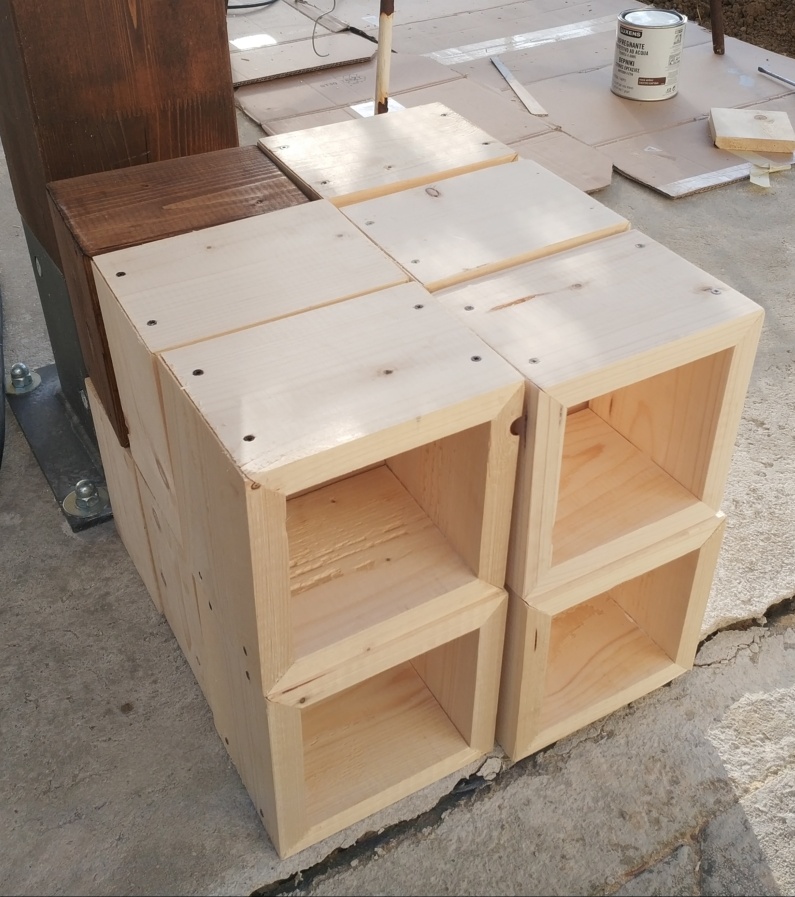
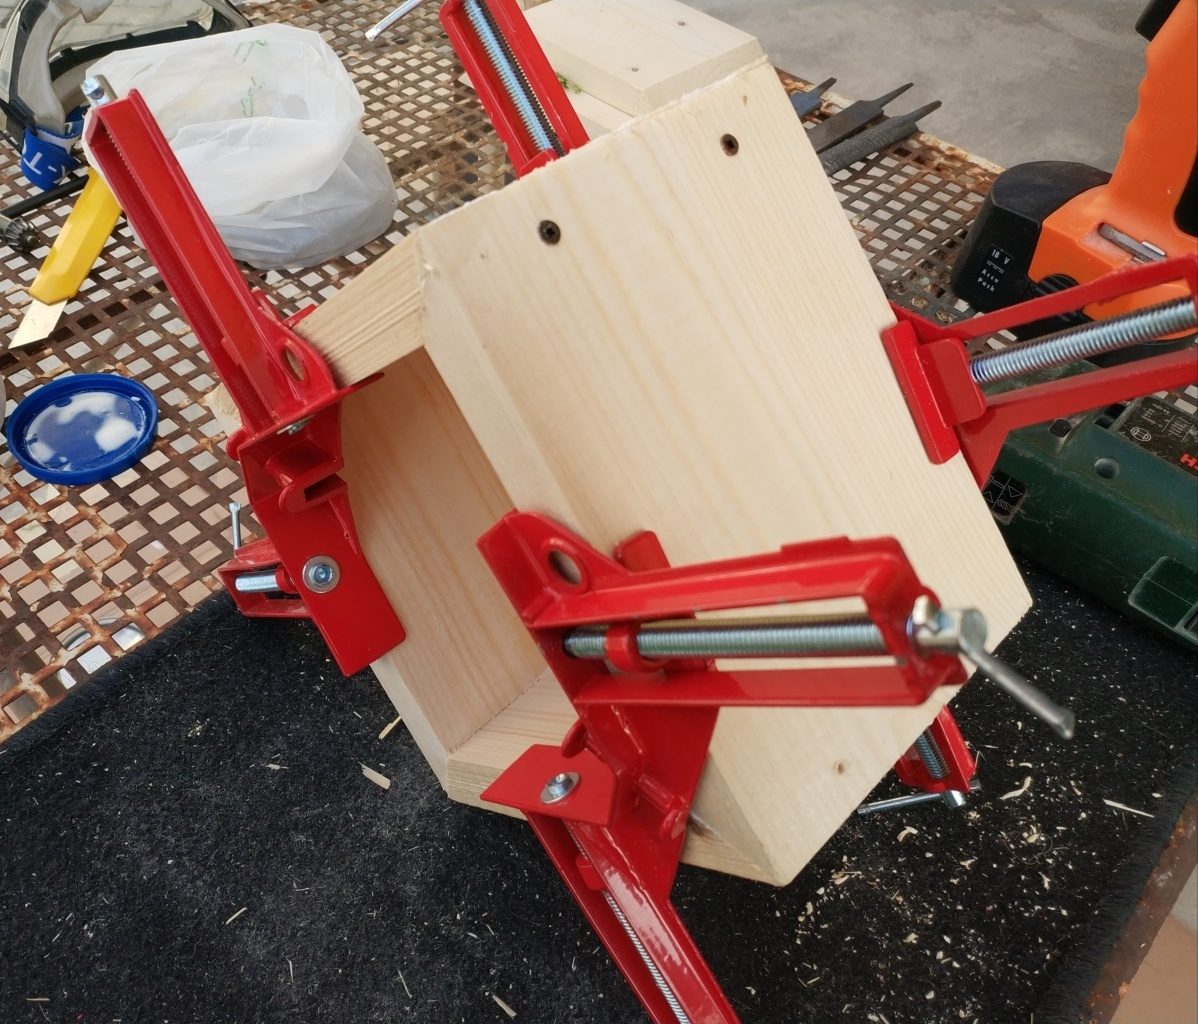
Well, it was a huge project. But at the begin the drywall was not planned, and I had lot of difficulties with the cube joints, due to the lacks of precision of the electric saw. I lost lot of time also for the filling of the cubes, vith vinil glue and sawdust, and for the painting.
I forgot to mention that the whole cost of the bookshelf is around 340$.
I need a bit of rest now. But I’m satisfied with the result.