

Era qualche tempo che volevo costruire un forno a legna in stile napoletano per delle pizze veraci tipiche. Come al solito vale la regola “…se può costruirlo qualcuno, perché non posso farlo da solo?”. Così ho cominciato a documentarmi.
E poi durante il lockdown dovevo anche tenermi occupato in qualche modo, no? Così nel giro di poche settimane ho cominciato a concretizzare il progetto, scegliendo materiali, controllando prezzi, stili ecc.
Budget altino, ma accettabilissimo per un forno di questo tipo: siamo di poco sopra i 1000€ di spesa totale. Ovviamente non ho considerato il tempo necessario a costruirlo, altrimenti non saprei nemmeno quantificare la spesa.
Di seguito vado in inglese, avevo già fatto una sorta di relazione e vado a recuperare quella.
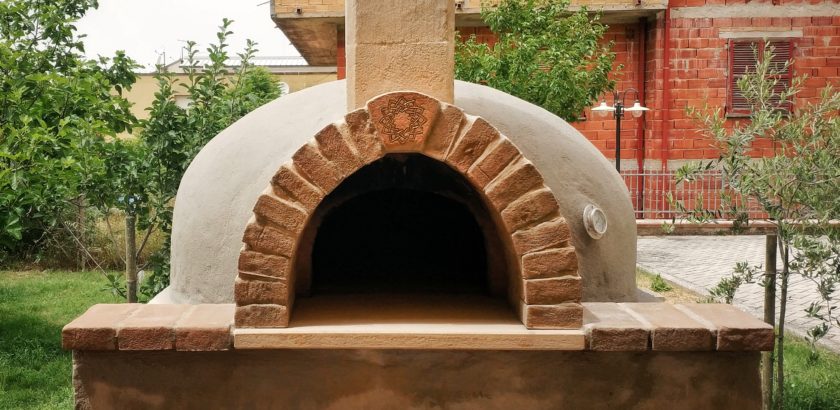
What a satisfaction to build up such this thing. It’s 110cm of diameter surface. The oven is a “verace” true naples oven which is very low vault (it’s 42 cm high, which is the max for a “verace”, but also good for bread and other things).
Main Materials:
250kg of concrete (premixed or 32.5 concrete+sand)
300 half hihg temp bricks (one half brick is about 10x12x3cm)
A plate for the oven (I found a furnace company which sells a typical “biscotto di Casapulla”)
45 concrete blocks for the wall
2sqmt of gasbeton bricks (under the base of the oven plate)
100lt of leca (expanded clay pearls)
60 bricks for the arches
100kg of high temp premixed concrete (>800°C)
10sqmt of fiber ceramic (or rock wool panels
1 piece of marble 70x27cm for the mouth of the oven (I had at home)
4sqmt of marble mosaic
10kg of tile glue for the mosaic
1 piece of wire mesh for the basement concrete casting and for the base of the oven
4 chimney blocks


All my neighbor’s engineer cats are directing the job. They’re checking for mistakes and catching fot little lizards in the meanwhile.
The base is about 150x170cm. About 12cm of thickness (I now tell u to make at least 170×170 basement as I was at the borders limit with my 110cm oven).
At first, just dig a 10cm hole where place some coarsely ground stones. Then place the wire mesh and pour the concrete (you may prefer premixed concrete instead of mix yourself cement and sand. Premixed is quite cheap and fast.
The concrete needs at leas a couple of days to dry.
The Wall and the Arch


As the final height of the mouth has to be approx at 105/110cm, I started to stack up the concrete bricks till a height of 80cm (4 stacked bricks + concrete)
The heights will be something like
80cm the wall
8cm a pouring of concrete
10cm of leca (expanded clay) mixed with 32.5 concrete
5cm gasbeton bricks (fire resistant)
2cm of mixed sand and ash
finally, the clay plate
Well, I made a template (108cm of diameter) to build up the arch.
The plane


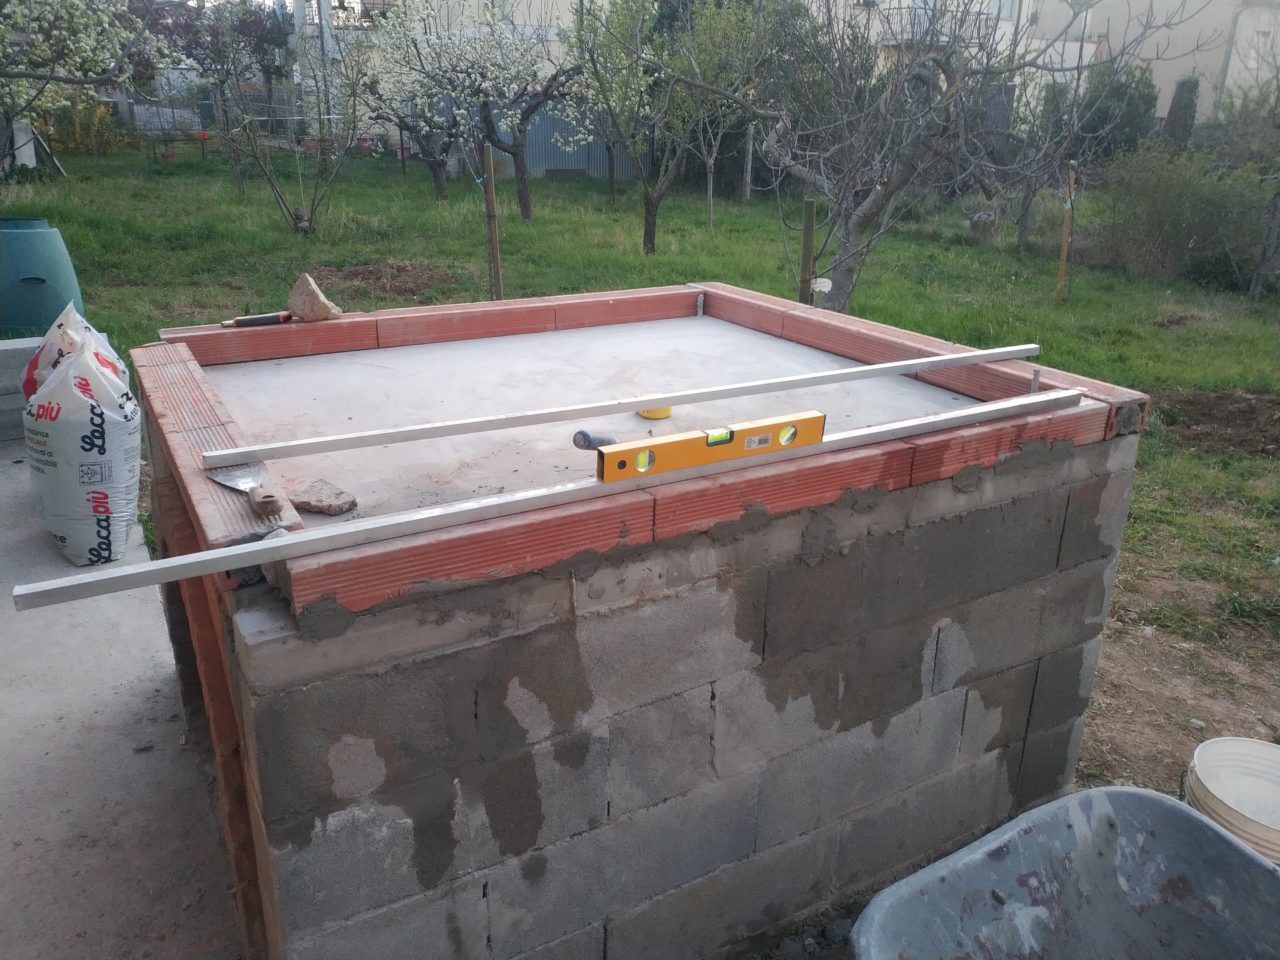


I carefully placed some wooden tables and a frame to make a pouring. If i remember well I needed 6 x 25kg premixed concrete bags.
Be accurate. you don’t want that a single table fall down ruining the job while pouring the concrete!
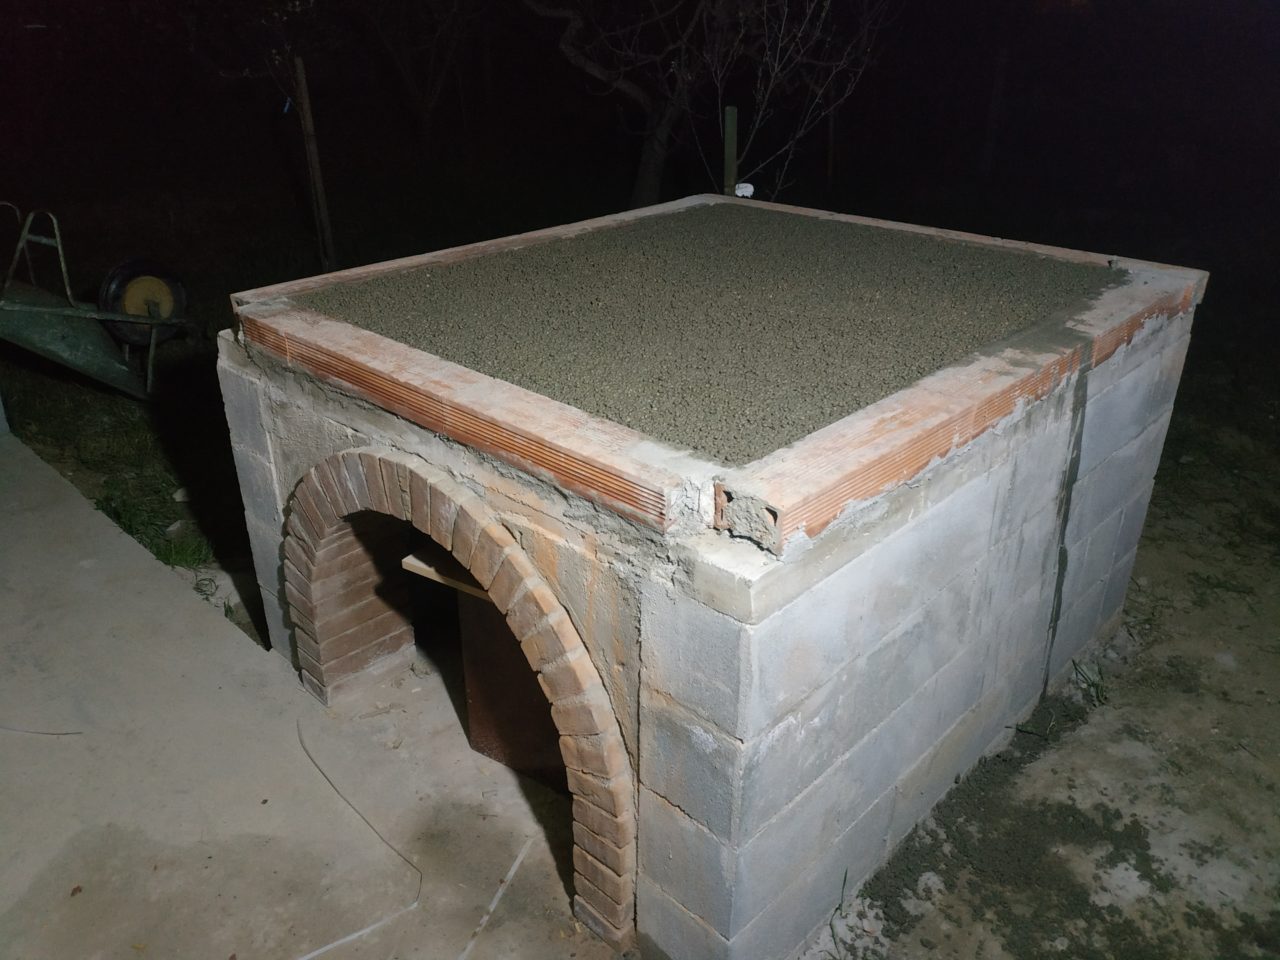
Once the concrete has dryed, in a couple of day, I made a frame with some red bricks, to pour also some expanded clay.
Finally, I put the gasbeton bricks and I began to view how to place the oven clay plate.
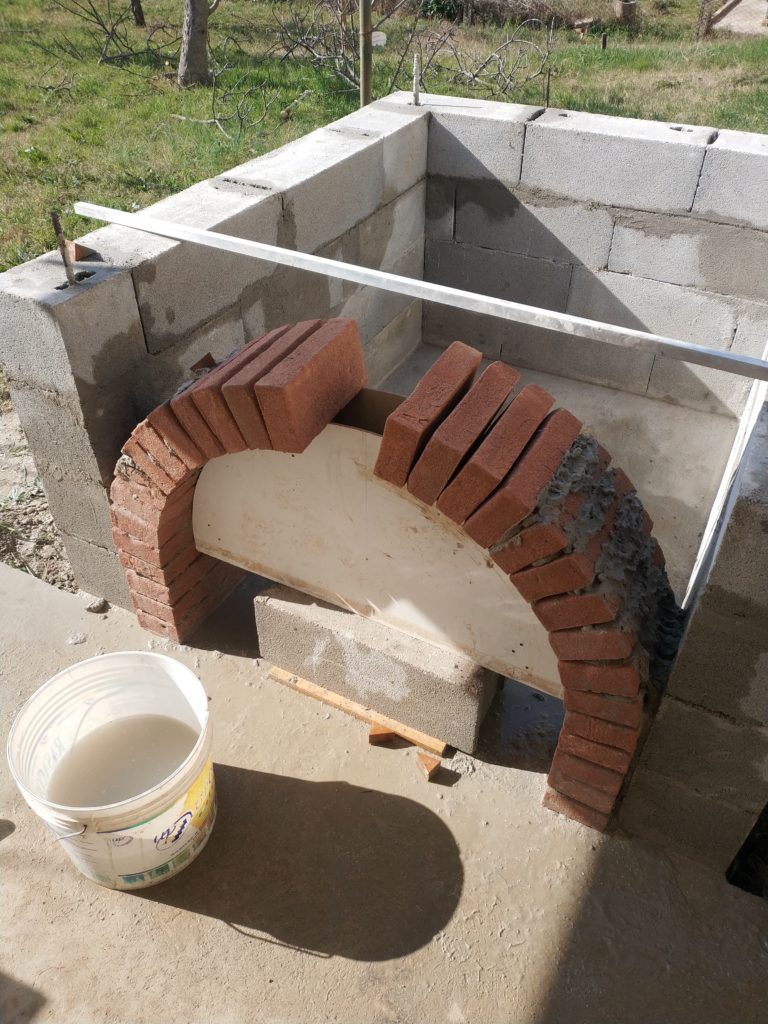
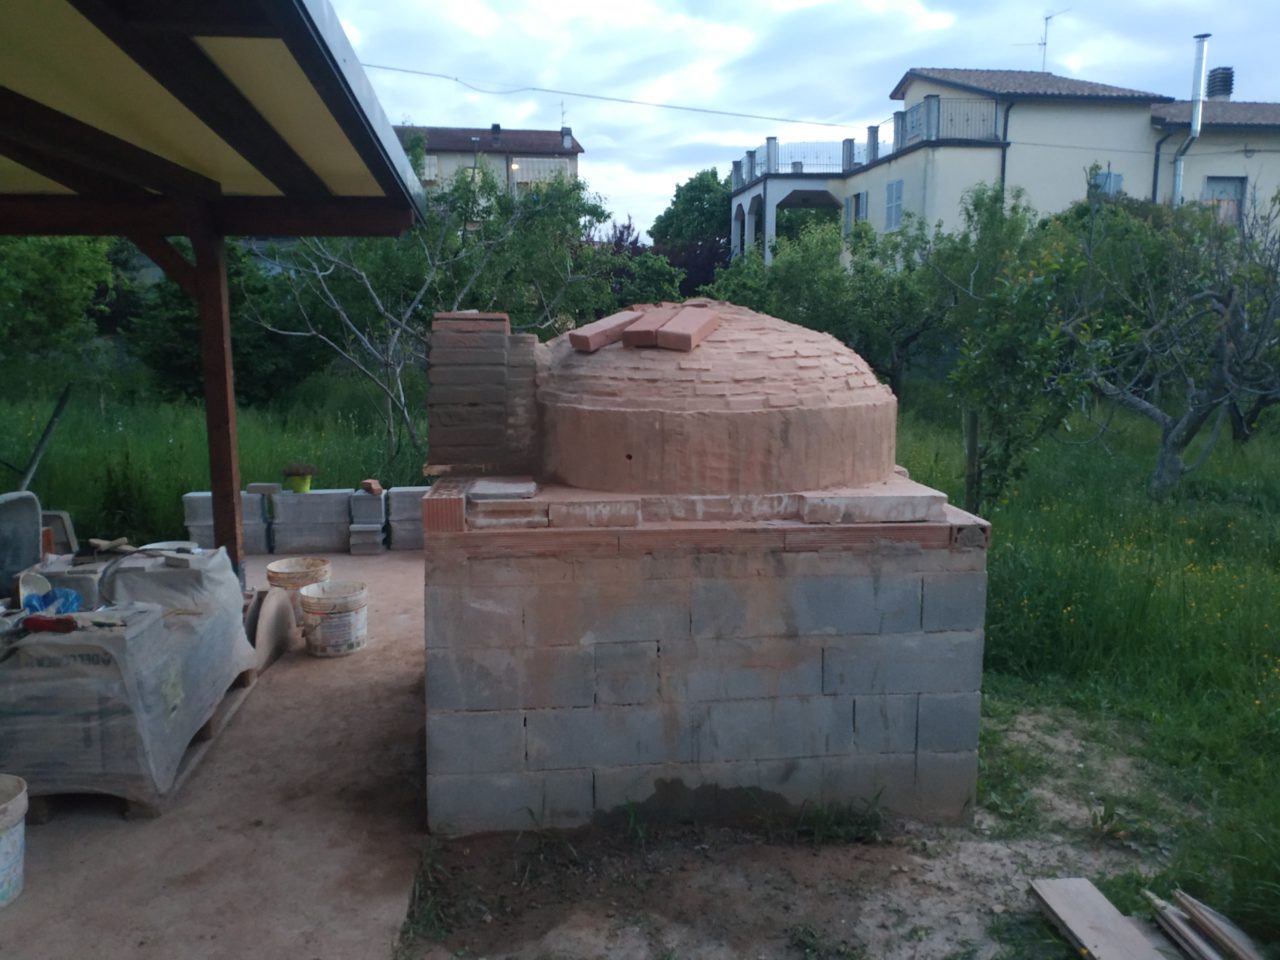
The first round of bricks


The picture are self-explain, but I just tell you to try the spaces a lot of times. Displace the plate and the brick to see how it will be. When you are satisfied you may start to make the first round. This will give you a big satisfaction, because this is the first true piece of the oven.
Just some little hints:
– Cut an angle of the bricks, to make it easy to make the archway later.
– Use a 1cm electric cable to make some space between the clay plate and the round of the bricks. Thermal expansion is important here, and don’t worry to fill tha gaps. Ashes will do the job later for you (and it’s going to settle by itselves).
– My suggestion is to make the mouth of the wall about 50cm and 38 of height. So use a template here, because the arch is extremely important and must be well shaped and aligned.
One half brick at a time


Patience is the key. This is my first experience in construction, and I had to learn a lot. I learned that all the surfaces must be very wet, I learned that refract concrete wll dry very fast, and you cannot easily mix again with water. So you will make few concrete each time, just to “glue” 10/15 bricks at a time.
The unit is the “half brick”. I cutted in half all the bricks (in the latest turns on the top, I had to cat the bricks more smaller too, and cut some angles too.. I can say that each brick is personalized for its place.
A template is a MUST here. You want to be absolutely accurate, and you’ll need to put the bricks on the template. There are few possibilities to make a template here. I just thought this method was pretty easy.
Otherwise, you may also build an half dome with sand, then clean all the sand from inside once you will have built your oven.
Second arch and chimney


Good templates also here are required.
I made my oven. If I would go back in time, I’d choice for a shorter mouth, and a bigger external arch, which will ease you to put the wood inside. But it’s ok.
I suggest to grind a bit the space where you’ll place the bricks over the marble, to make a better grip.
The second arch is important, must be an “invite” for the smoke, so it’s a bit different compared with the third external arch, which will need to stop the smoke.
Then place carefully the first block of the chimney. This is a 15cmx15cm squared one inside, which is quite enough to capture all the smoke when the oven will became hot.
Wool Panels, Ceramic Fiber and Thermal Insulation


Well, technically, you have now to insulate the oven with fiber and a new concrete pouring…
But… but now it’s more convenient to start some small fire. Well, generally some cracks are not so rare, so you may begin to start a small fire inside the oven, to let it dry slowly slowly.
This process should be in two weeks at least, and the first times few pieces of paper or some wooden stick will be enough.
You may then add the insulating fiber, to protect from the temp difference while you start fires each time bigger.
Then after all, you may check for a crack and easily repair before pour the concrete over the fiber.
Fix your fiber to a metallic net (tipically the one that you would use to build a henhouse).
Concrete Pouring Over the Fiber

You may add a couple of cm of concrete, and an extra layer of hydrofobic concrete. The reason is that in winter, water has to be avoided. When it penetrates a small crack, then it will ice, destroying fast the oven. Let’s say that this extra hydrofobic layer will grant the oven a longer life.
MOSAIC and We Almost Are Going to See the Light at the End of the Tunnel


I found a very cheap “travertino” as an offer (common italian marble).
These are the very last steps. you’ll need about 4sqmt to cover the entire oven,
and I can ensure you that at this point jou just want to finish the project.
Use a normal outdoor glue for gres, stones etc. and place your stones. It would need about 10kg.
Then, let it dry 48/72 hours.
Finally, covert the tile joints with a Mapei ultracolor GG which has a bigger grain.
Now I don’t know what else… uh, yes, in the meanwhile I covered the base wall with some layer of concrete, which I will paint later (still have to choose the color).
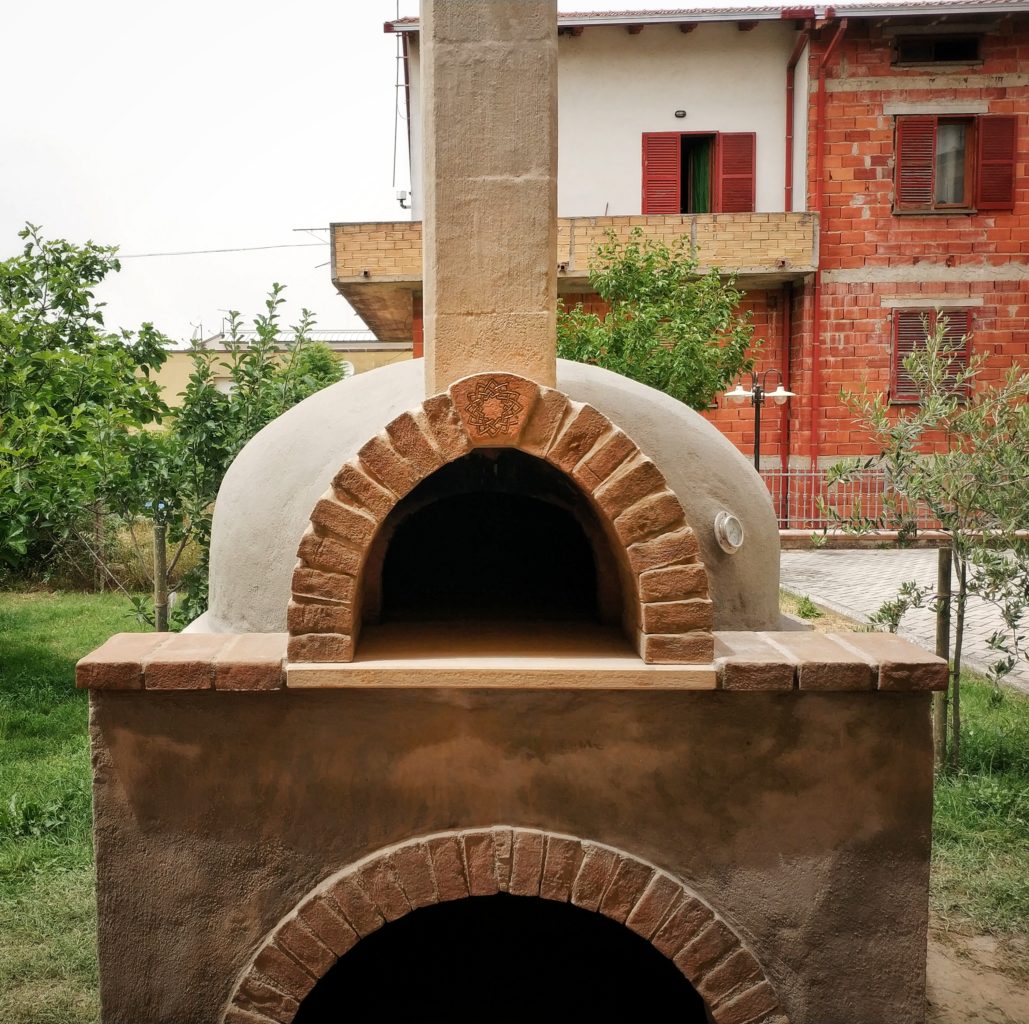
In the end.
It was a “titanic” undertaking for me. I started the project in mid december ’20, And I finished it 6 months later.
I placed every single brick by myself, in the weekends, and in my spare time. But, what a satisfaction.
This is a true satisfaction!!!
Paolo